10 Best Beach Crafts

10 Best Beach Crafts

Do you love the beach so much that you wish you could live there year-round? Are you longing to curl your toes in warm sand and to feel the salty ocean breeze caress your skin?

Every summer, millions of Americans head to the beach to relax in the sun and cool down in the shimmering surf. If you hold the beach in your heart, we’ll help you bring sand and sea into your home with fun and easy beach crafts. We promise — they aren’t too messy!

We chose the following crafts to do at the beach because they take little time, do not require too many supplies and many can be enjoyed with the kids. So, get out your craft supplies and get ready to celebrate sunshine, sand and briny ocean air.

1. Gone Swimming Beach Plaque

Beach-themed wall art is easy to make and looks great in nautical bathrooms or family rooms. This beachy plaque from Crafts by Amanda conjures playful images of running through sand and into the water. Also, you can have fun collecting seashells to add to the plaque, preserving beach-day memories. Here are the supplies you’ll need:

  • Hanging plaque
  • Acrylic paint in tan and antique white
  • An assortment of seashells and starfish
  • One large starfish
  • Black craft marker
  • Sand
  • Flat paintbrush
  • Scruffy paintbrush
  • Hot glue gun
  • White craft glue
  • Water
  • Matte acrylic sealer spray

Directions:

  1. Paint the plaque antique white.
  2. Apply two coats and allow it to dry.
  3. Glue the large starfish on the left side of the plaque with the hot glue gun.
  4. Glue the smaller starfish and seashells around the bottom and right side of the plaque.
  5. In the center of the plaque, use the black marker to write “gone swimming” in your favorite playful script.
  6. Mix a nickel-sized amount of white craft glue with water to thin it out, and paint the mixture on the plaque where you want to place sand.
  7. Pour sand over the glue and let it sit for a moment, then shake off excess.
  8. Dip the scruffy paintbrush in tan paint and dab it on a paper towel — brush should be almost dry.
  9. Dab tan paint around the words and edges of the sand.
  10. Spray acrylic sealer over the entire surface and allow it to dry completely.

Hang your sea-inspired plaque on the bathroom door or near the shower to remind you of your favorite swimming spot any day of the year.

2. Seashell Candles

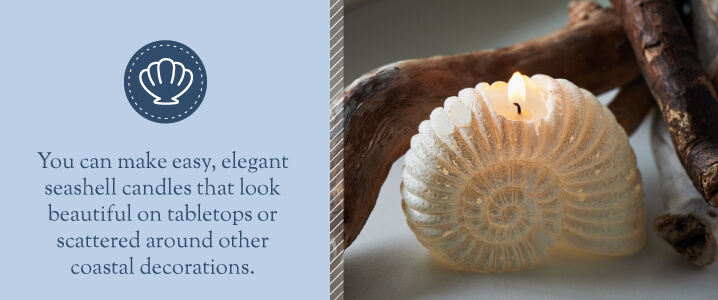
If you and the kids love to collect seashells, you probably have piles of them stashed around the house. You can put your shell collection to use and make easy, elegant seashell candles that look beautiful on tabletops or scattered around other coastal decorations.

These tiny candles create an instant sense of calm as they softly glow from their shells. They also make lovely party favors for summertime festivities. Here’s what you’ll need to make candles in seashells, according to Martha Stewart:

  • Seashells
  • Bleach
  • Water
  • Wax
  • Double boiler
  • Wicks with holders

Here is what you will do:

  1. Clean the seashells in a weak bleach and water solution.
  2. Melt the wax in a double boiler.
  3. Pour the melted wax into each seashell until they are almost full.
  4. Carefully place wicks with holders into the bottom of the shells.
  5. If the wicks do not stand upright, trim them.
  6. Allow the wax to cool and completely harden, about 30 minutes.

You might consider adding a drop of essential oil to the melted wax in a scent that reminds you of the ocean. When your candles are ready, set the patio table with a pretty blue tablecloth and your new shell candles. Warm up the grill and prepare to have a twinkling beachside barbecue, even if you’re miles away from the shore.

3. Easy Shell Hairpins

These hairpins take only minutes to make and are delightful accessories for beach-lovers. Little girls will be thrilled to feel like mermaids with their seashell hairpins. Here’s all you’ll need, as suggested by Swell Life:

  • Small seashells
  • Hairpins with a flat surface
  • Two-part epoxy
  • Nail polish if you wish to paint them

Here’s what you’ll do:

  1. Rinse and completely dry shells.
  2. Mix the epoxy adhesive according to package instructions and let it sit for a few minutes.
  3. Using the epoxy, attach the shells to the hairpins.
  4. Apply nail polish if you wish.

If you decide to apply nail polish, consider using clear polish for shine and to bring out the natural seashell colors. Children might like glittery nail polish for a touch of mermaid magic. When the hairpins are dry, you’re ready to add the shells to your beach-worthy hairdo and head to the shore.

4. Sea in a Bottle

Toddlers and babies love to shake, roll and gaze at their little sea in a bottle. Adults can also enjoy a personal piece of the sea. When you’re at the office longing for the sound of crashing waves and cawing seagulls, pull your portable sea out from your desk drawer and take a moment to meditate.

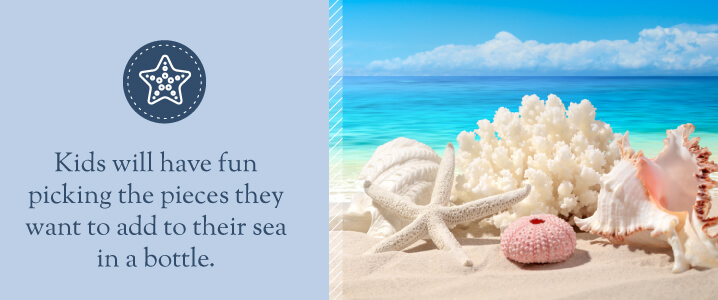
Kids will have fun picking the pieces they want to add to their special bottle too. It’s so easy to make and brings a lot of joy. Here’s what you’ll need to make a sea in a bottle, from Childhood 101:

  • One lightweight plastic bottle
  • Water
  • A drop of blue food coloring
  • Clear or colored plastic or glass gemstones
  • Silver glitter
  • Small seashells
  • Silver star sequins
  • Electrical tape or hot glue

Directions:

  1. Add the gemstones and seashells to the bottle.
  2. Fill the bottle three-quarters full with water.
  3. Add a drop of blue food coloring.
  4. Add a tablespoon of glitter and a handful of stars.
  5. Secure the lid tightly with colorful electrical tape or hot glue.

Voila! Every time you or your child long to be at the beach, just let your eyes wander the shapes and glitter of your sea in a bottle and make plans to get there soon!

5. Medicine Cup Jellyfish

Has a rainy day delayed your beach plans? Cheer up the kids with these adorable easy-to-make jellyfish. This craft is perfect for children who love the beach and want to decorate their bedroom with sea-inspired creations.

You can hang the jellyfish in front of the child’s window from a curtain rod or anywhere you wish. When you open the window to let in a gentle summer breeze, the jellyfish will swirl around as if it were soaring through the deep blue sea. Here’s what you’ll need to make a super-cute plastic medicine cup jellyfish from Kix:

  • Plastic medicine cup
  • Button
  • Tissue paper in fun ocean-inspired colors like white or blue
  • Two googly eyes
  • 24-inch piece of embroidery floss
  • Needle
  • Glue
  • Scissors

Directions:

  1. Poke a hole in the center of the bottom of the medicine cup with the needle.
  2. Thread the embroidery floss through both holes in the button.
  3. Line up the two ends of the floss, so they are at an equal length.
  4. Thread both ends of the floss through the needle.
  5. Poke the needle through the bottom of the medicine cup, from the inside of the cup.
  6. Pull the needle through the hole until the button touches the cup, and secure the button in place with glue.
  7. Remove the needle from the floss and tie the two ends together.
  8. Cut four strips of tissue paper about three inches wide in your color of choice.
  9. Add a generous amount of glue to the inside of the medicine cup.
  10. Place your thumb in the center of the tissue paper strips.
  11. Gather the strips around your thumb.
  12. Push your thumb and the tissue paper into the medicine cup.
  13. Trim the ends of the tissue paper with scissors, so they are all the same length.
  14. Starting at the bottom of the tissue paper, cut into smaller strips up into the cup.
  15. Glue two googly eyes to the outside of the cup.
  16. Allow the jellyfish to dry before hanging.

Parents will have to help children make their jellyfish, so it’s a great activity to do together. Make as many jellyfish as you wish and have fun experimenting with different colored tissue paper. These jellyfish make good summertime birthday decorations too.

6. Clamshell Critters

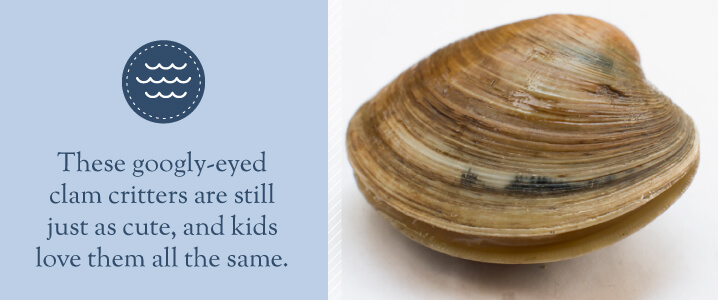
Although real clams do not have eyes, these googly-eyed clam critters are still just as cute, and kids love them all the same. To make these colorful and fun clamshell critters from Free Kids Crafts, you’ll need:

  • Clamshells
  • Paint
  • Paintbrush
  • Googly eyes
  • Newspaper
  • Tacky glue

Directions:

  1. Clean and dry clamshells.
  2. Protect your work area with newspaper.
  3. Paint the outside of the clamshells in your favorite colors.
  4. Let them dry.
  5. Glue on googly eyes.
  6. After the eyes dry, your clamshell buddy is ready.

To make them extra special, you might glue magnets to the backs and decorate the fridge. Little ones can enjoy painting each clamshell a unique color, and you can name each shell together. Maybe you could even create a clam-critter house or special box to store them in.

7. Sand Clay

Who would’ve thought you could turn sand into clay and it would harden so easily? According to the blog Paging Fun Mums, you can — and it’s easy. Imagine all the seaside treasures you and the kids can make with sand clay. To get started, here’s what you’ll need:

  • 1 1/2 cups sand
  • 1 1/2 cups cornstarch
  • 2 cups baking soda
  • 1 1/2 cups water

Here’s what you’ll do:

  1. Combine all four ingredients in an old medium saucepan.
  2. Heat over medium-high heat, constantly stirring until the mixture thickens to a dough-like consistency.
  3. Place the “dough” onto a sheet of parchment paper and allow it to cool under a damp towel.
  4. Model the clay into sandcastles or other shapes, or make imprints with shells, toys or starfish.
  5. Bake the creations in the oven on low heat or around 200 degrees Fahrenheit for two hours.
  6. Allow clay to cool in the oven completely before removing to prevent cracking.

Always make sure to drape a damp towel over the clay before molding, to prevent premature drying. When the pieces are finished, place them next to other beachside decorations to capture the essence of the coast.

8. Seashell Soap Dish

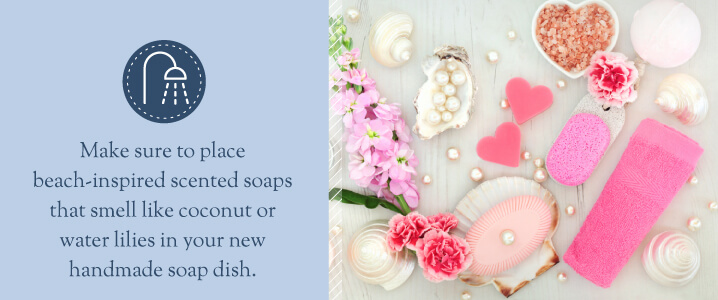
Another way to use those big shells you’ve gathered at the shore is to turn them into a soap dish. Everyone will enjoy washing their hands as they think of the beach, sun and invigorating ocean waves. Make sure to place beach-inspired scented soaps that smell like coconut or water lilies in your new handmade soap dish. Here’s what you’ll need to make a seashell soap dish, according to Martha Stewart:

  • One big clamshell and one small one
  • Two-part epoxy
  • Newspaper

Here’s what you’ll do:

  1. Wash and dry the shells.
  2. Make a crumpled ring of newspaper to work upon and protect the shells.
  3. Attach the shells back-to-back with epoxy.
  4. Place the shells in the newspaper, small shell down, so the paper supports the big shell and keeps it from falling out of place.
  5. Make sure the epoxy does not touch the newspaper.
  6. Allow them to dry thoroughly.

Put your new soap dish in the bathroom or at the kitchen sink and enjoy.

9. Seashell Night-Light

If your child is afraid of the dark, help calm their fears with this easy seashell night-light from Martha Stewart. They can use their favorite seashell and remember the fun they had in the sun at any hour. The nightlight also looks lovely in the bathroom or hallway. All you need is:

  • A seashell with a flat surface
  • Night-light
  • Epoxy glue

Directions:

  1. Clean and dry the shell.
  2. After the shell dries completely, apply epoxy glue to the night-light clip and then press it on the flat part of the shell.
  3. When the epoxy is dry, attach the clip to the socket.

Let the warm glow of an illuminated seashell guide you in the night!

10. Ship’s Porthole

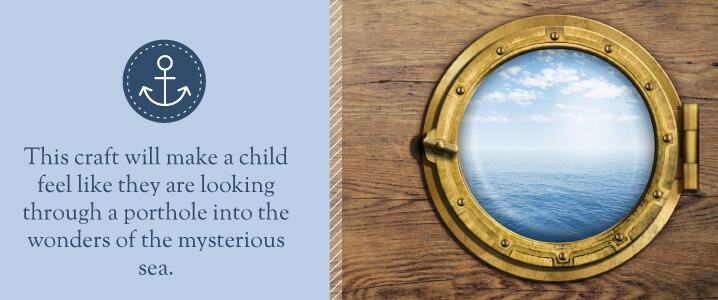
This craft will make a child feel like they are looking through a porthole into the wonders of the mysterious sea. You and a child can work together to create any scenery you wish, whether you want an octopus looking in at you or mermaids waving from the shore. Here’s how to make a ship’s porthole, from Crafts by Amanda. You’ll need:

  • Two paper plates
  • Silver craft paint
  • Eight pieces of ring-shaped cereal
  • Fish-shaped crackers
  • Silk plant leaves
  • Seashells
  • Sand
  • White craft glue
  • Blue cellophane
  • Wax paper
  • Pencil
  • Scissors

Directions:

  1. Place one paper plate right side up on the table, and the other one upside down.
  2. On the right-side-up plate, draw your seafloor about one-third of the way up the center of the plate.
  3. Line the floor area with glue and spread it out evenly with your finger or an old paintbrush.
  4. Cover the glue with sand and allow it to dry.
  5. On the upside-down plate, draw a circle where you want to your porthole, in the center of the plate.
  6. Glue ring-shaped cereal pieces around the circle for the bolts.
  7. Paint the cereal pieces and the paper plate from the outer edge to the penciled lines with the silver paint.
  8. Set aside to dry.
  9. Take the paper plate with the sand on it and hold it over wax paper.
  10. Gently tap the plate to loosen excess sand.
  11. Glue sea life onto the plate with the sand floor like shells, silk leaves and fish-shaped crackers.
  12. Allow the plate to dry.
  13. Take the silver plate and cut out the center circle to create the porthole window.
  14. Turn the silver plate upside down.
  15. Cut a piece of blue cellophane large enough to cover the hole on the plate and glue it in place.
  16. Let it dry.
  17. Place the porthole plate over the top of the sea life plate and glue together.
  18. Allow the glue to dry.

You can glue string or yarn between the two plates so you can hang the porthole. If you do not have blue cellophane, you can paint the sea floor before adding sand.

Visit Ocean City Today

Beach-themed crafting will get you in the spirit for fun in the sun and allows you to enjoy coastal creations all year long. When it’s time to hit the shore, have fun collecting seashells for your next project.

Ocean City, N.J., is the ideal family resort for your beach escape. Without the crowds of other resorts, Ocean City is the perfect spot to build sandcastles with the kids, play in the waves or stroll the boardwalk for souvenirs or locally-made fudge. Open year-round, accommodations are affordable, and there’s plenty of room for everyone to stretch out and breathe in the fresh ocean air.

If you feel the ocean calling you, pack your favorite beach bag and get ready for fun and relaxation. Visit Ocean City, America’s greatest family resort, today!

Previous ArticleHow to Play Mini Golf - Infographic Next ArticleCreate Your Ultimate Beach Playlist